 Hushtop
Get started with Hushtop
Last updated: 8 October 2026
On this page
Before you start#
Hushtop runs on Macs with Apple silicon on macOS 15 or later. On a display without a notch, it shows a small floating island at the top of the screen instead.
The trial needs no account, no email and no card.
Move it to Applications#
Open the downloaded Hushtop.dmg and drag Hushtop to the Applications folder.
Always open it from Applications. Permissions you give a copy that runs from the disk image, or from another folder, stop working when you move it. If you open it from somewhere else, Hushtop asks you to move it first.
Open it the first time#
Hushtop is signed and notarized by Apple. The steps are the same on macOS 15 and later.
- Open Hushtop from Applications.
- macOS asks once: “Hushtop is an app downloaded from the Internet. Are you sure you want to open it?” Click Open.
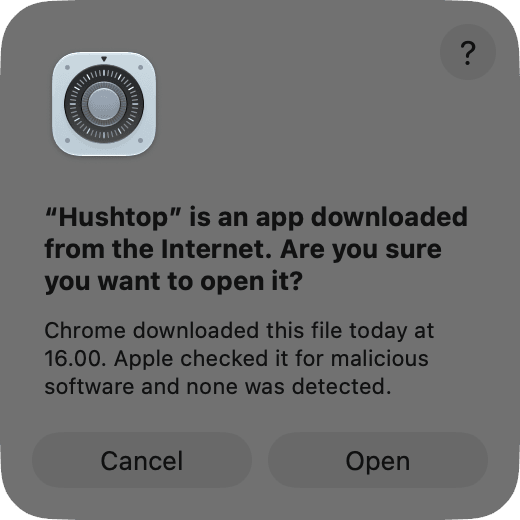
That’s it. After that, Hushtop opens and updates normally.
Allow Accessibility#
Accessibility is the one permission Hushtop asks for during setup. It lets Hushtop react to the keys and menus you already use: paste clipboard items into the app in front, show the volume HUD, move files with ⌘X and ⌘V in Finder, hold back an accidental ⌘Q and fit the ears beside your menu bar. It never reads your screen and never records what you type.
- On the One permission step, click the button on the Accessibility card.
- When macOS asks, open System Settings › Privacy & Security › Accessibility (called Device Control and Data Access on macOS 27).
- Turn on Hushtop. Hushtop notices and moves on by itself.

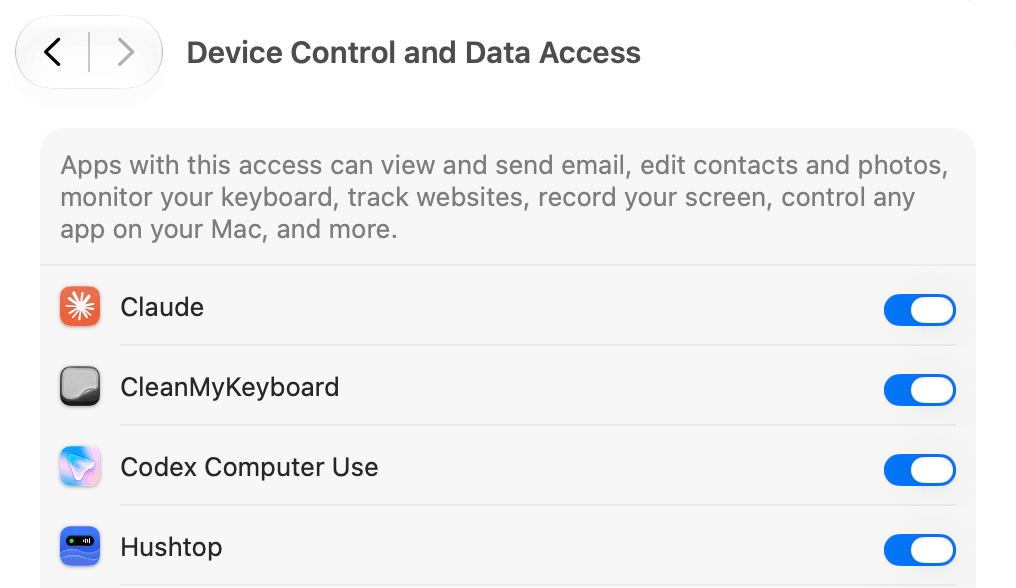
Every other permission is asked the first time you use the feature that needs it, right where you use it. You can see them all in Settings › Privacy.
The setup window#
The first time Hushtop opens, a short setup walks you through these steps. You can skip any of them and change everything later in Settings.
- Welcome: what Hushtop is, and your free trial.
- How will you use it?: pick all that fit (Everyday, Developer, AI engineer, Freelancer, Writer, Video editor). Hushtop turns on the tools that fit and shows you what changes first.
- We found these apps: apps Hushtop can work with on your Mac. Nothing is asked yet.
- One permission: Accessibility.
- Connect agents, for Developer and AI engineer: connect Claude Code and Codex. You see every change first, your own setup keeps working, and Remove undoes it.
- You’re set: choose whether the notch opens on hover or on click, then take a 20-second tour on the real notch, or start using it.
To come back to setup later, click the Hushtop icon in the menu bar and choose Setup & permissions….
What the notch does#
The notch grows to show what’s happening, then tucks back. Live things appear in the ears beside the camera: the song playing, a timer, your next meeting, AirPods connecting, the charger, an agent at work.
- Hover over the notch, or click it if you chose click, to open it. The dock at the bottom switches between surfaces; right-click anything in it to change it.
- Press ⌃⌥N to open the notch from the keyboard. Arrow keys move around and Esc closes it.
- Press ⌥Space for the command palette, which finds any action.
Hushtop lives in the menu bar, not the Dock. Its menu has Open Hushtop… (Settings), Setup & permissions…, Pause notch, Quiet mode and Quit Hushtop. To keep it in the Dock too, turn on Settings › General › Always show in Dock.
Startup and updates#
Hushtop doesn’t start at login unless you ask. Turn on Settings › General › Launch Hushtop at login.
It checks for updates once a day. To check now, open Settings › About and click Check for Updates….
Your trial#
The trial lasts 7 days and starts the first time Hushtop runs, so the install steps never use up trial days. Nothing is locked while it lasts. Settings › License shows the days left, and Hushtop reminds you when 3 days are left and on the last day.
After the trial, Hushtop keeps working as Hushtop Lite until you buy. Your license explains what stays on.